
Soil testing for construction: a guide for Australian project teams

Last Updated Aug 20, 2026
Josh Krissansen
122 articles
Josh Krissansen is a freelance writer with two years of experience contributing to Procore's educational library. He specialises in transforming complex construction concepts into clear, actionable insights for professionals in the industry.
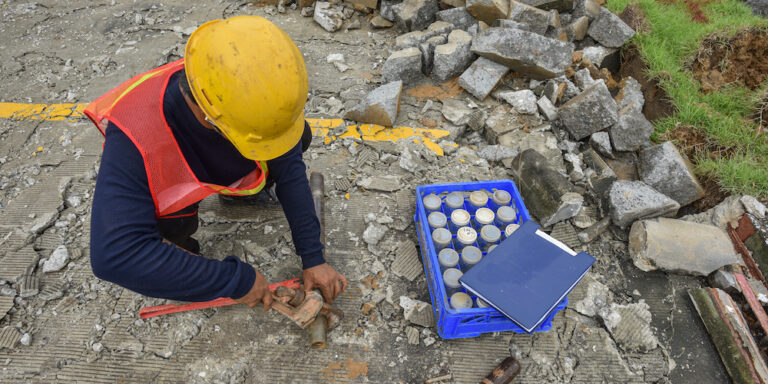
Soil testing is the investigation and laboratory analysis of ground conditions at a site to determine soil type, bearing capacity, reactivity, and groundwater before design and construction.
The results shape the foundation design, set the site classification that feeds the building permit, and determine who carries the cost if excavation finds ground the testing did not predict.
In this article, we cover what soil testing involves, how AS 2870 site classification works, what the results mean for cost and programme, and how to use test scope to control claims risk.
Table of contents
What is soil testing in construction?
Soil testing in construction is the sampling and analysis of ground at a proposed build site to establish its physical and chemical properties for foundation and earthworks design.
These tests measure:
- Bearing capacity
- Reactivity (the shrink-swell behaviour of clay)
- Moisture
- Contamination
- Erosion potential
- Soil profile and depth to limiting layers such as bedrock or water table.
The work is carried out by geotechnical engineers and NATA-accredited laboratories, with samples collected on site and then analysed in the lab. Testing is commissioned during preconstruction so that the results feed structural foundation design and the building permit application. It is governed by AS 1726 for the site investigation itself and AS 2870 for how the results translate into site classification.
Why soil testing matters for construction
The information a soil test produces directly impacts what can and can’t be built on a site, and how.
Bearing capacity and reactivity dictate the slab and footing type the structural engineer can specify. Without the test data, you’re designing the foundation off of an assumption, which is likely to turn up as a redesign and schedule delay later.
That can be a costly mistake.
A move from a low class to a highly reactive one can shift slab and footing costs by tens of thousands of dollars, and if the soil report comes in after preliminary budgets are set, it becomes a variation, a margin hit, or a dispute, depending on how the contract allocates ground risk.
Soil testing sits on the critical path not just for foundation design but for permit approval. Late commissioning or results that call for more investigation push back the construction start date.
It also informs material choice. Soil chemistry affects the long-term durability of concrete and buried metals. The chemical results tell the structural engineer whether the design needs sulphate-resistant concrete, thicker cover, or corrosion protection on buried services.
Types of soil tests and methods for construction
Site investigation in Australia uses three broad methods: borehole drilling, test pits, and in-situ probing. Each recovers different information at different depths and cost, and most jobs use a combination.
Boreholes
Boreholes are drilled to recover soil samples at depth for laboratory analysis. They establish the full soil profile and reach limiting layers such as bedrock or the water table, which shallower methods cannot see.
Test pits
Test pits are excavated to expose the soil profile directly at shallow depth. They are cheaper and quicker than boreholes but limited to what can be reached with a backhoe or excavator.
Penetration and in-situ testing
The cone penetration test (CPT), standard penetration test (SPT), and dynamic cone penetrometer (DCP) measure the resistance the soil offers to a driven or pushed probe. That reading translates to strength and density in place, without having to lift a sample out of the ground.
Laboratory tests
Samples recovered from boreholes and test pits are sent to a NATA-accredited lab for analysis. Common tests include:
- Atterberg limits for plasticity and reactivity
- Particle size distribution
- Moisture content
- Unconfined compressive strength
- California Bearing Ratio (CBR) for pavement design
The number of test locations scales with the size and risk of the site. A handful of boreholes may cover a standard residential lot, but a commercial or civil footprint needs a wider spread to catch variation across the site.
The cost of the investigation scales based on the same factors.
A standard AS 2870 site classification on a residential block may cost several hundred dollars, while a full geotechnical investigation on a commercial or civil footprint runs into the thousands, especially where deep drilling, slope stability, or acid sulphate assessment is required.
How site classification works under AS 2870
AS 2870 classifies a site by how much the ground is expected to move as a result of soil reactivity, which is mainly the shrink-swell behaviour of clay as moisture changes.
Four factors (clay reactivity, depth to stable layers, moisture conditions, and fill on the site) are assessed, and sites are then classified into these classes:
- A (stable, non-reactive)
- S (slightly reactive)
- M (moderately reactive)
- H1 and H2 (highly reactive)
- E (extremely reactive)
- P (problem sites that need an engineered solution because standard designs cannot accommodate the ground)
The class that a site falls into sets the footing and slab system the structural engineer can specify, and therefore the cost of that trade. For example, a Class A site takes a standard slab, while an H2 or E site calls for a stiffened raft, deeper edge beams, or piering.
Pro tip: Site classification is required as part of the building approval process in Australia, so the report needs to be in hand before the permit application can be lodged.
Using investigation scope to control claims risk
Site investigation is not just an engineering task. The scope you set, and what you disclose at tender, decides who pays if the ground on site turns out to be different from what the report described.
On any job where the ground is uncertain, that scope is a commercial decision as much as a technical one.
Scope the investigation to the site, not the template
Brief the geotechnical engineer for the actual footprint of the works, and match the depth and spread of the investigation to the size and the ground risk of the site so local problems are found before excavation rather than after.
Where the ground is uncertain, do more up front. A second round of boreholes costs a fraction of what a variation and delay claim would.Sequence testing early and hold float for a second round
Commission testing early enough that a second round of investigation, if the first pass flags a problem, doesn’t push the construction start date out.
Further boreholes, deeper drilling, or additional lab work all take time, meaning the programme should have float built in for soil testing from the outset.Check how the contract allocates latent conditions risk
Confirm how the construction contract treats latent conditions before you sign.
Under Australian standard form contracts, what matters is what could reasonably have been foreseen from the site information provided at tender. Check which reports were included in the tender documents, and what they said, because that is what a later claim will be judged against.Disclose the full report at tender
Include the full geotechnical report in the tender package. What you disclose at tender sets the baseline for any later latent conditions claim.
A summary that leaves out a borehole log or a recommendation weakens the position on both sides if the ground turns up something the summary did not flag.Log ground conditions as they are found
Keep a variation register, an EOT register, and an RFI log running from the start of site works.
Record ground conditions as they are exposed, with dates, photos, and depths, so any claim is backed by evidence made at the time rather than reconstructed weeks later.
Soil testing decides what gets built, what it costs, and who pays if the ground surprises the project
Soil testing is the piece of preconstruction work that turns ground assumption into ground data, which then feeds the foundation design, the site classification, the permit, and the tender price.
Scoping the investigation to the site, sequencing it early, and disclosing the full report at tender is how project teams keep that data working for them on site rather than against them in a claim.
Categories:
Written by
Josh Krissansen
122 articles
Josh Krissansen is a freelance writer with two years of experience contributing to Procore's educational library. He specialises in transforming complex construction concepts into clear, actionable insights for professionals in the industry.
View profileExplore more helpful resources

Scaling with SIERA: Building for now and what comes next
SIERA Founder and Director Brent Thompson has always known that the right people, systems and hands-on approach are fundamental to scaling his business successfully. In Part 1, Brent and Head...

Getting Your Construction Data Ready for AI – What Every Business Needs to Consider Before Launching AI
This is the first of two articles. This part sets out the considerations: what clean and trusted data actually means, how to measure it, how the two systems most businesses...

The Contractor’s Guide to Concrete Inspections
Concrete: It’s the key building block of nearly every structure’s foundation — and it’s the world’s most widely used building material. For most head contractors, understanding how to assess concrete...

Computer-Aided Design (CAD): What It Is — and Why It’s Important
When most people envision a construction worker, they see a person at a construction site wearing a hard hat and a high-vis vest. Perhaps this person is putting up plasterboard,...